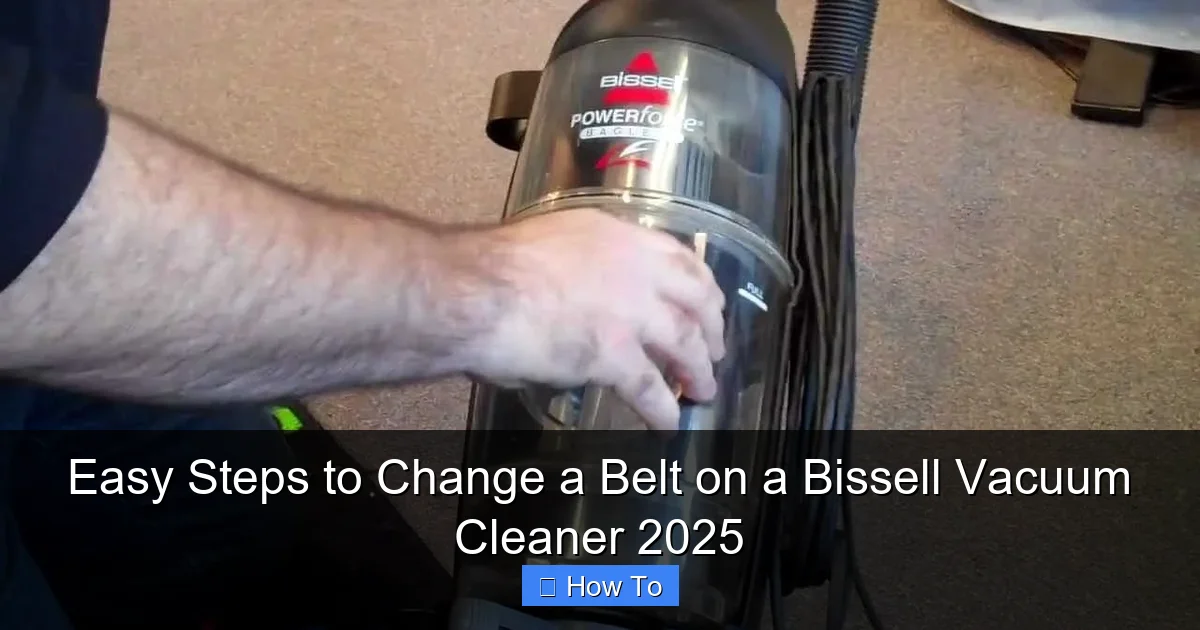
Easy Steps to Change a Belt on a Bissell Vacuum Cleaner 2025
Restore your Bissell vacuum’s cleaning power with this comprehensive guide on how to change its belt. You’ll learn the simple, step-by-step process, from safety precautions and gathering tools to removing the old belt and installing a new one. This guide ensures your Bissell vacuum cleaner belt replacement is quick, efficient, and gets you back to sparkling clean floors in no time.
Ah, the humble vacuum cleaner belt! It might seem like a small, unassuming component, but it’s the unsung hero powering your Bissell vacuum’s brush roll, giving it that fantastic deep-cleaning action. Over time, like any hardworking part, your vacuum belt can stretch, fray, or even break. When that happens, you might notice your vacuum isn’t picking up dirt as effectively, the brush roll isn’t spinning, or perhaps there’s an unusual burning smell. Don’t despair! You don’t need to rush out and buy a new vacuum. Learning how to change a belt on a Bissell vacuum cleaner is a simple, empowering DIY task that can restore your machine to its former glory.
In this comprehensive guide, “Easy Steps to Change a Belt on a Bissell Vacuum Cleaner 2025,” we’re going to walk you through every single step, making the process as straightforward and stress-free as possible. Whether you’re a seasoned DIY enthusiast or picking up a screwdriver for the first time, our friendly, clear instructions will ensure you successfully replace your Bissell vacuum belt. By the end of this guide, you’ll not only have a perfectly functioning vacuum but also the satisfaction of knowing you’ve saved money and extended the life of your beloved Bissell. Let’s get those floors sparkling again!
Key Takeaways
- Safety First: Always unplug your Bissell vacuum cleaner before attempting any maintenance, especially when changing the belt, to prevent accidental power-on and injury.
- Right Tools & Parts: Ensure you have the correct replacement belt for your specific Bissell model, along with basic tools like a screwdriver and a cleaning brush.
- Inspect and Clean: Before installing the new belt, thoroughly inspect and clean the brush roll and the belt housing area for any tangled hair, debris, or blockages.
- Proper Belt Tension: A new belt should fit snugly but not be overly tight or loose. Incorrect tension can lead to premature wear or ineffective cleaning.
- Test Before Final Assembly: After placing the new belt and brush roll, do a quick test run (without the cover) to ensure everything spins correctly before reassembling the entire unit.
- Regular Maintenance: Changing your Bissell vacuum cleaner belt regularly (every 6-12 months or as needed) is crucial for maintaining optimal suction and cleaning performance.
Quick Answers to Common Questions
What causes a vacuum belt to break?
Vacuum belts typically break due to age, wear and tear, or excessive strain. Common culprits include the belt stretching over time, friction from tangled hair or debris jamming the brush roll, or simply a manufacturing defect.
How often should I change my Bissell vacuum cleaner belt?
Bissell generally recommends changing your vacuum belt every 6 to 12 months, or sooner if you notice a decrease in performance, a burning smell, or if the brush roll stops spinning. Heavy use or pet hair may require more frequent changes.
Can I use any belt for my Bissell vacuum?
No, it’s crucial to use the exact replacement belt specified for your Bissell vacuum cleaner model. Different models use different sizes and types of belts (e.g., flat, V-belt, geared), and an incorrect belt can cause damage or poor performance.
How do I know if my Bissell vacuum belt is broken?
Signs of a broken or worn belt include the brush roll not spinning, reduced suction and agitation on carpets, or a burning rubber smell. Visually inspecting the underside of the vacuum will often reveal a snapped, frayed, or stretched belt.
Is it hard to change a Bissell vacuum belt?
Not at all! Changing a Bissell vacuum belt is a straightforward DIY task that most people can accomplish with basic tools and a little guidance. This guide is designed to make it as easy as possible for you.
1. Safety First: Unplug Your Bissell Vacuum!
Before you even think about touching your Bissell vacuum cleaner, this is the most critical step. Your safety is paramount. Working on an appliance that is still plugged in can lead to serious injury or electrical shock. Think of it like taking the keys out of your car’s ignition before working under the hood.
Prioritizing Your Safety
Locate the power cord and pull it directly from the wall socket. Do not simply turn off the vacuum cleaner with its power switch. The switch only cuts power to the motor; the internal components might still have residual electricity or could accidentally activate. Once unplugged, you can proceed with confidence, knowing you’ve minimized any risk.
Allowing for Cooling Down
If your vacuum has been running recently, especially if the belt broke due to friction, some parts might be warm or even hot. Give it a few minutes to cool down completely before you start working on it. This small pause can prevent minor burns and make the entire process more comfortable.
2. Gathering Your Tools and Supplies for the Belt Change
Having everything you need ready before you start will make the process smooth and quick. No one wants to stop mid-task to hunt for a screwdriver! To successfully change a belt on a Bissell vacuum cleaner, you’ll need a few common items.
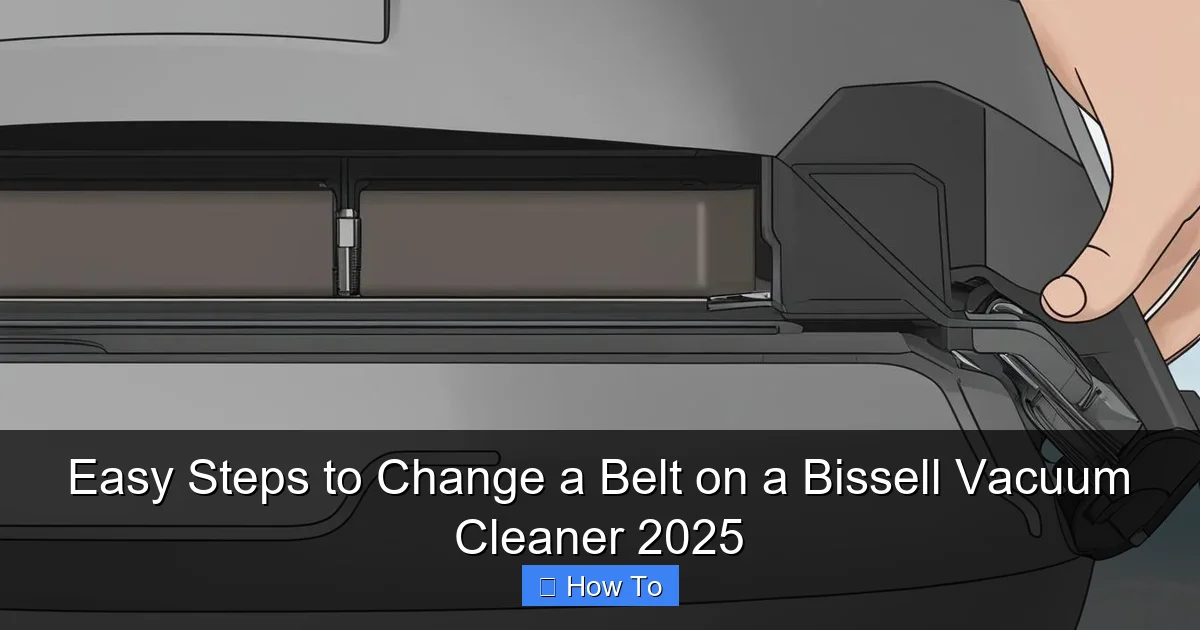
Visual guide about Easy Steps to Change a Belt on a Bissell Vacuum Cleaner 2025
Image source: vacmasterguide.com
The Essential New Bissell Vacuum Belt
Of course, the star of the show is your new replacement Bissell vacuum cleaner belt. It’s crucial to purchase the correct belt for your specific Bissell model. Check your vacuum’s user manual or look for a model number sticker on the back or bottom of the unit. Bissell offers various belt types (flat, V-belt, geared), and using the wrong one can lead to improper function or damage. You can usually find replacement Bissell belts on Bissell’s official website, Amazon, or at local appliance parts stores.
Basic Hand Tools
- Screwdrivers: Most Bissell vacuums use Phillips head screws, but some might have flatheads. A multi-bit screwdriver set is always handy.
- Pry Tool (Optional but Recommended): A flat-head screwdriver or a plastic pry tool can help gently lift covers or dislodge stubborn parts without causing damage.
Cleaning Aids
- Scissors or a Seam Ripper: Essential for cutting away tangled hair, strings, and fibers from the brush roll.
- Old Toothbrush or Stiff Brush: Great for scrubbing away dirt and dust from crevices.
- Microfiber Cloth: For wiping down parts.
- Work Gloves (Optional): To protect your hands from grime and sharp edges.
3. Preparing Your Bissell for the Belt Replacement
With safety handled and tools at the ready, it’s time to get your Bissell vacuum cleaner prepped for its belt replacement surgery.
Finding a Suitable Workspace
Choose a well-lit area with enough space to lay your vacuum down. A table or a clean section of the floor will work. Laying down an old towel or newspaper can help protect your work surface from dirt and contain any debris that falls out of the vacuum.
Positioning Your Vacuum
Carefully lay your Bissell vacuum cleaner on its front or side, exposing the underside where the brush roll and belt are located. The exact position will depend on your specific model, but generally, you want clear access to the bottom plate or brush roll cover.
Clearing Obstructions
If your Bissell has any detachable hoses, tools, or the dust cup, it’s a good idea to remove them. This gives you more room to maneuver and prevents them from getting in the way or being damaged during the process of replacing the Bissell belt.
4. Accessing the Brush Roll and Belt Area
This is where you’ll start getting into the heart of your vacuum. Don’t worry, it’s usually just a few screws standing between you and the old belt.
Locating the Brush Roll Cover
On the underside of your Bissell vacuum, you’ll see a plate or cover that houses the brush roll. This is typically held in place by several screws. Take a moment to identify all the screws you’ll need to remove. Some models might have latch clips in addition to screws.
Removing the Retaining Screws
Using your screwdriver, carefully loosen and remove all the screws holding the brush roll cover in place. It’s a good practice to place these screws in a small bowl or on a magnetic tray. This prevents them from rolling away and getting lost, which can be surprisingly frustrating when you’re ready to reassemble.
Gently Lifting the Cover
Once all the screws are out, gently pry off the brush roll cover. It might be a little snug due to accumulated dirt or a tight fit, but it should come off with light pressure. Avoid forcing it, as you could crack the plastic. If it’s very stubborn, double-check if there are any hidden clips or additional screws you missed.
5. Inspecting the Old Belt and Cleaning the Area
Now that the brush roll is exposed, you’ll likely see the culprit – your old vacuum belt. This is also the perfect opportunity for some much-needed vacuum TLC!
Assessing the Condition of the Old Belt
Look at the old Bissell vacuum cleaner belt. Is it stretched out? Is it frayed or cracked? Has it snapped completely? This inspection helps confirm that the belt was indeed the problem. A stretched belt often looks loose and won’t properly engage the brush roll, leading to poor cleaning.
Examining and Cleaning the Brush Roll
The brush roll itself is a magnet for hair, string, and carpet fibers. These can wrap around the bristles and the axle, significantly hindering its performance and putting extra strain on the belt. Use your scissors or seam ripper to carefully cut away any tangled debris. Be thorough – even a small amount of trapped hair can reduce efficiency. You can also use your old toothbrush to scrub the bristles clean.
Deep Cleaning the Belt Housing
While you have everything open, take advantage of the access to clean the area where the belt sits. Dust, pet hair, and small debris can accumulate in this housing, potentially interfering with the new belt. Use your brush or cloth to wipe away any grime. Ensure the motor shaft (the small spindle where the belt loops) is also clean and free of obstructions.
6. Removing the Old, Worn-Out Belt
With the area clean, it’s time to remove the old belt and prepare for the new one.
Detaching the Brush Roll (if necessary)
On many Bissell models, you’ll need to remove the brush roll to properly access and replace the belt. The brush roll usually just lifts out of its slots once the cover is off. Sometimes it has end caps that need to be wiggled free. If your model allows you to change the belt without removing the brush roll, great! If not, gently lift it out and set it aside.
Carefully Taking Off the Belt
If the old Bissell belt is still intact, simply slide it off the motor shaft and then off the brush roll. If it’s broken, just remove the pieces. Discard the old belt; it has served its purpose.
7. Installing the Brand New Bissell Vacuum Cleaner Belt
Now comes the moment of truth – installing your brand-new Bissell belt. This step requires a little bit of dexterity, but it’s very achievable.
Positioning the Belt on the Brush Roll
Take your new Bissell vacuum cleaner belt. Loop it around the brush roll first, usually in the groove specifically designed for the belt. Make sure it sits securely in this groove.
Aligning the Belt with the Motor Shaft
If you removed the brush roll, gently place it back into its housing. As you do this, stretch the new belt around the motor shaft. The motor shaft is usually a smaller metal or plastic spindle located to one side of the brush roll housing. This can be the trickiest part, as new belts are tight and require some stretching. Use your fingers or a flat-head screwdriver to carefully pull and maneuver the belt over the motor shaft until it sits firmly in its groove.
Practical Tip: Make sure the belt isn’t twisted. It should lay flat and smooth around both the brush roll and the motor shaft. If it’s twisted, it won’t function correctly and will wear out quickly.
Reinserting the Brush Roll (if removed)
Once the belt is properly looped around both the brush roll and the motor shaft, ensure the brush roll is correctly seated back in its slots. Give it a gentle spin by hand to confirm it moves freely and the belt doesn’t slip off.
Ensuring Proper Tension
A new Bissell belt should feel snug and offer a good amount of resistance when you try to turn the brush roll by hand. If it feels loose, double-check that it’s correctly seated. If it feels extremely tight and difficult to move, you might have the wrong size belt, or it might be twisted. Proper tension is key for effective cleaning and belt longevity.
8. Reassembling Your Bissell Vacuum Cleaner
You’re almost there! It’s time to put your Bissell back together.
Reattaching the Brush Roll Cover
Carefully place the brush roll cover back into position. Make sure all edges align properly with the base of the vacuum. It should sit flush. Don’t force it; if it’s not fitting, check if the brush roll or belt is out of place.
Securing the Screws
Once the cover is aligned, reinsert all the screws you removed earlier. Tighten them securely, but don’t overtighten, as this can strip the plastic threads. Just enough to hold the cover firmly in place.
Brief Functionality Check
Before moving to the final test, it’s a good idea to gently spin the brush roll by hand one more time. It should turn smoothly with a moderate amount of resistance from the new belt. This confirms everything is properly aligned before you apply power.
9. Final Checks and a Test Run
The moment of truth has arrived! Time to see your handiwork in action.
Plugging In and Powering On
Plug your Bissell vacuum cleaner back into a wall outlet. Turn it on. Immediately observe the brush roll. Is it spinning? Is it spinning smoothly and consistently?
Listening and Observing
Listen for any unusual noises – grinding, squealing, or excessive vibrations. A new belt might make a slightly different sound initially, but it should quickly settle into a normal operating hum. Check for suction and how well the brush roll agitates the carpet. If your model has an indicator light for the brush roll, confirm it’s illuminated and green (or whatever indicates normal operation).
Practical Tip: Test it on a small patch of carpet or a dusty hard floor. You should immediately notice an improvement in cleaning performance compared to before you learned how to change a belt on a Bissell vacuum cleaner.
Addressing Any Issues
If something doesn’t seem right (brush roll not spinning, strange noises, no suction), turn off and unplug the vacuum immediately. Go back to the troubleshooting section below. Don’t continue to run the vacuum if it’s not operating correctly, as this could cause further damage to your new Bissell vacuum cleaner belt or other components.
Troubleshooting Common Issues After a Bissell Belt Change
Even with careful steps, sometimes issues arise. Here are solutions to common problems after you change a belt on a Bissell vacuum cleaner.
My Brush Roll Isn’t Spinning!
- Is the belt installed correctly? Double-check that the new Bissell belt is properly seated on both the motor shaft and the brush roll groove, and isn’t twisted.
- Is the brush roll installed correctly? Ensure the brush roll is fully seated in its end caps or bearings and can spin freely by hand (when unplugged).
- Is there still debris? Even a small amount of tangled hair or string can impede the brush roll. Remove the cover and clean again.
- Motor issue? In rare cases, if the belt broke due to severe blockage, the motor itself might be damaged. This usually requires professional repair.
My Vacuum Has No Suction!
- Check for blockages: No suction isn’t always a belt issue. Check the hose, filter, and dust cup for clogs.
- Belt tension: A belt that’s too loose won’t spin the brush roll effectively, impacting agitation and perceived suction. Ensure it’s snug.
- Brush roll height adjustment: Make sure your vacuum’s brush roll height setting is appropriate for your floor type. Too high on carpet will reduce agitation.
There’s a Burning Smell!
- Belt friction: This is common with new belts initially as they “seat” themselves, especially if the brush roll has some residual debris. Run it for a few minutes; if the smell persists, unplug it.
- Belt too tight: If the new Bissell vacuum cleaner belt is too tight, it puts excessive strain on the motor and brush roll, causing friction and overheating. You might have the wrong size belt.
- Brush roll blockage: Even a new belt will burn if the brush roll is completely jammed and can’t spin freely. Turn it off, unplug, and inspect for hair/debris.
The Belt Keeps Breaking!
- Wrong belt size: A belt that’s too small or too thin will be under constant stress and break prematurely. Ensure you have the exact model-specific Bissell belt.
- Persistent blockages: If your brush roll frequently gets jammed with hair or debris, it will constantly strain and break belts. Implement regular brush roll cleaning.
- Worn brush roll bearings: If the brush roll itself isn’t spinning freely due to worn bearings, it will put too much load on the belt. Try spinning the brush roll by hand when the belt is off; it should turn easily. If not, the brush roll might need replacement.
Conclusion
Congratulations! You’ve successfully learned how to change a belt on a Bissell vacuum cleaner. Not only have you saved money on repairs or a new vacuum, but you’ve also gained valuable DIY skills. Regular maintenance, including changing your Bissell vacuum cleaner belt every 6 to 12 months (or as recommended in your manual), will keep your machine running efficiently and prolong its lifespan.
Remember, a well-maintained vacuum isn’t just about sparkling floors; it’s about a cleaner, healthier home environment. So, go ahead, plug in your newly refurbished Bissell, and enjoy the satisfying hum of its powerful brush roll, knowing you made it happen. Happy cleaning!
🎥 Related Video: How to change the Belt on Proheat 2X Revolution | BISSELL
📺 BISSELL
This video gives you a step-by-step guide to change the belt on your Proheat 2X Revolution. Get your carpet clean with the …